Light Bright

Remember that game “Light Brite” where you could make cool designs, pictures or patterns with different colored pegs that lit up when you plugged it in? I recall playing that game at my Grandma’s a lot as a kid, always suprised by how neat it looked when you turned it on. Fast forward to today and Ben and I both still have a thing for lights and designs and patterns. Lights in a house are a good thing to look at every now and again as a potential way to update a space or create a fun, new look.

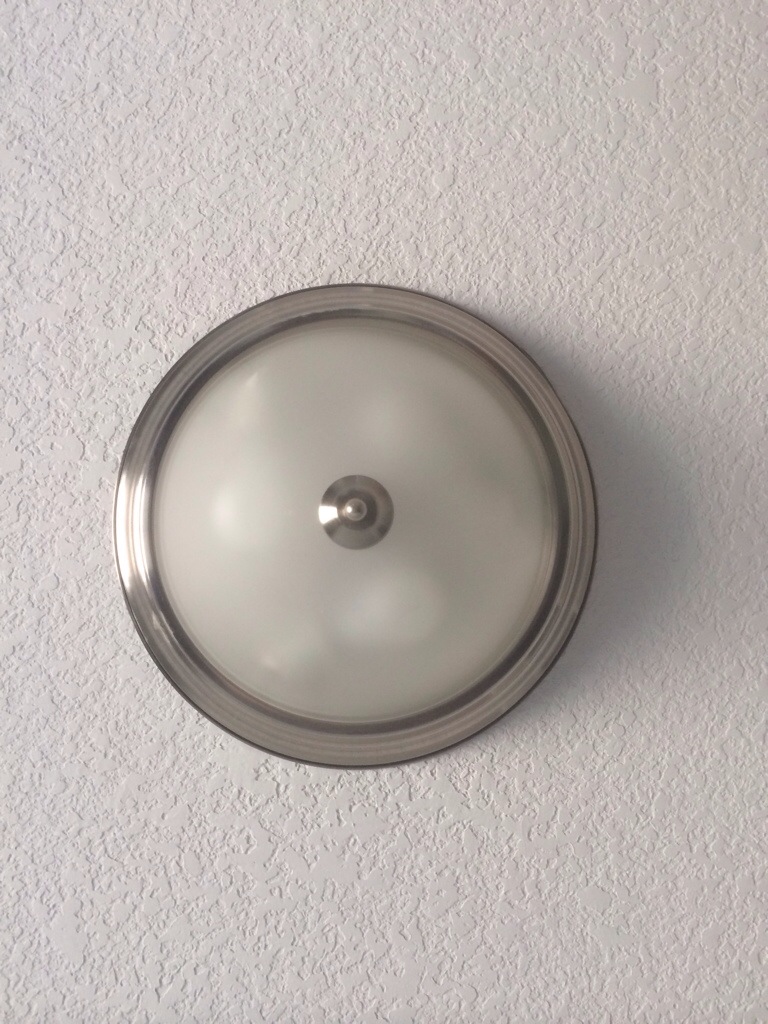
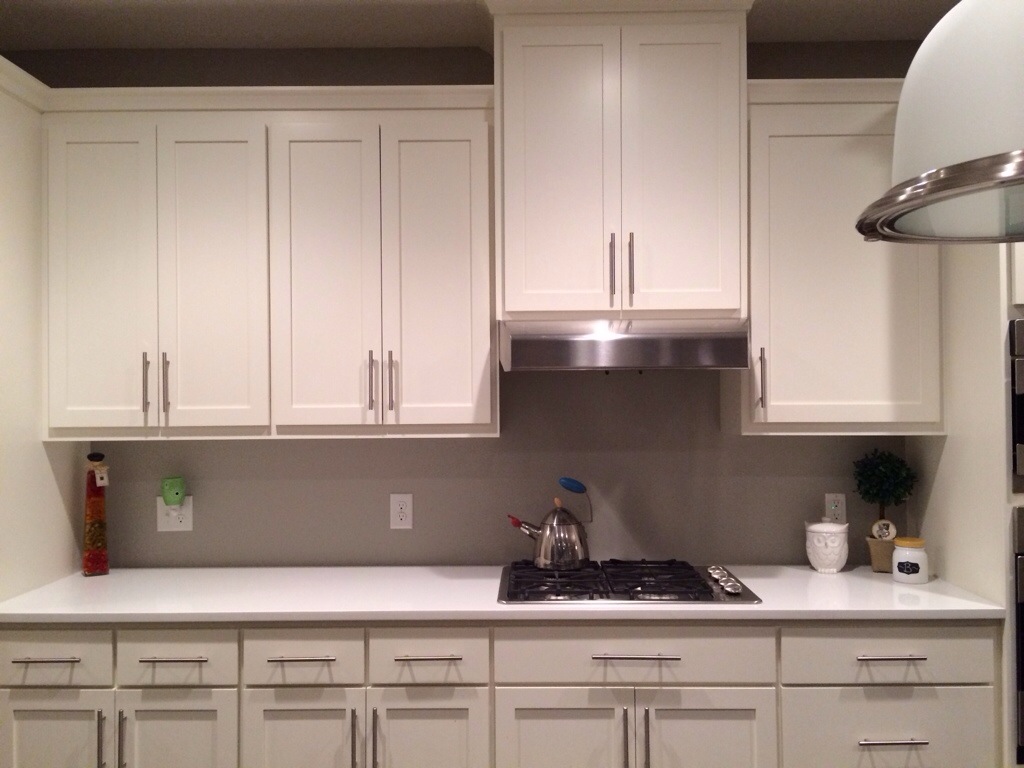
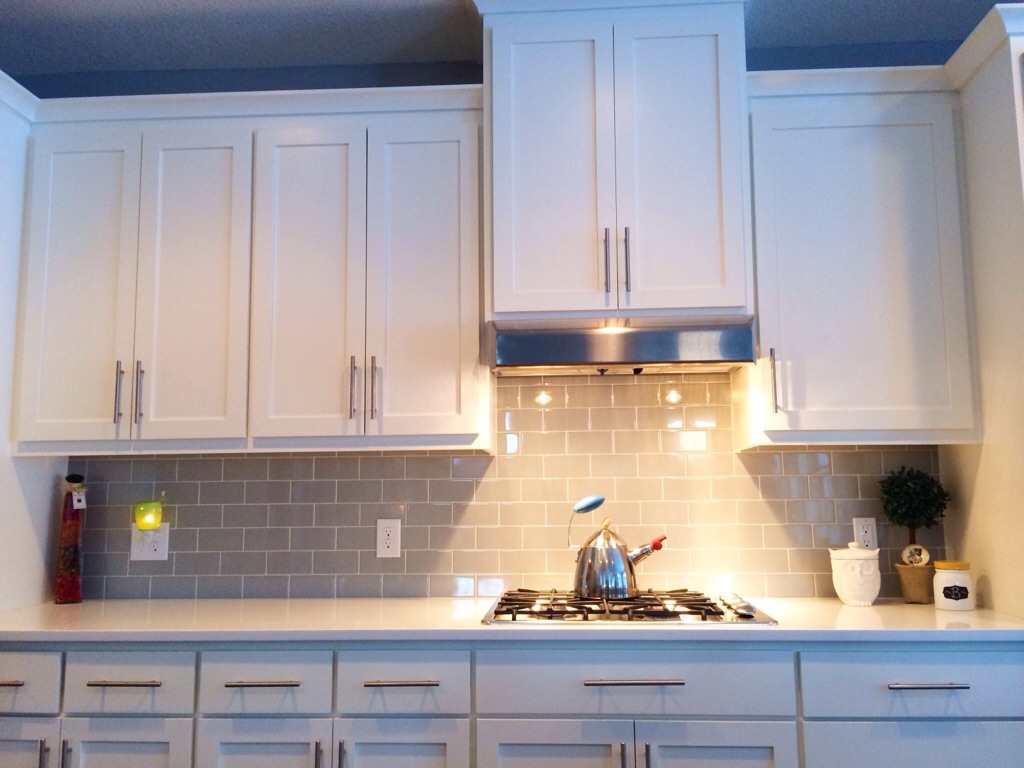
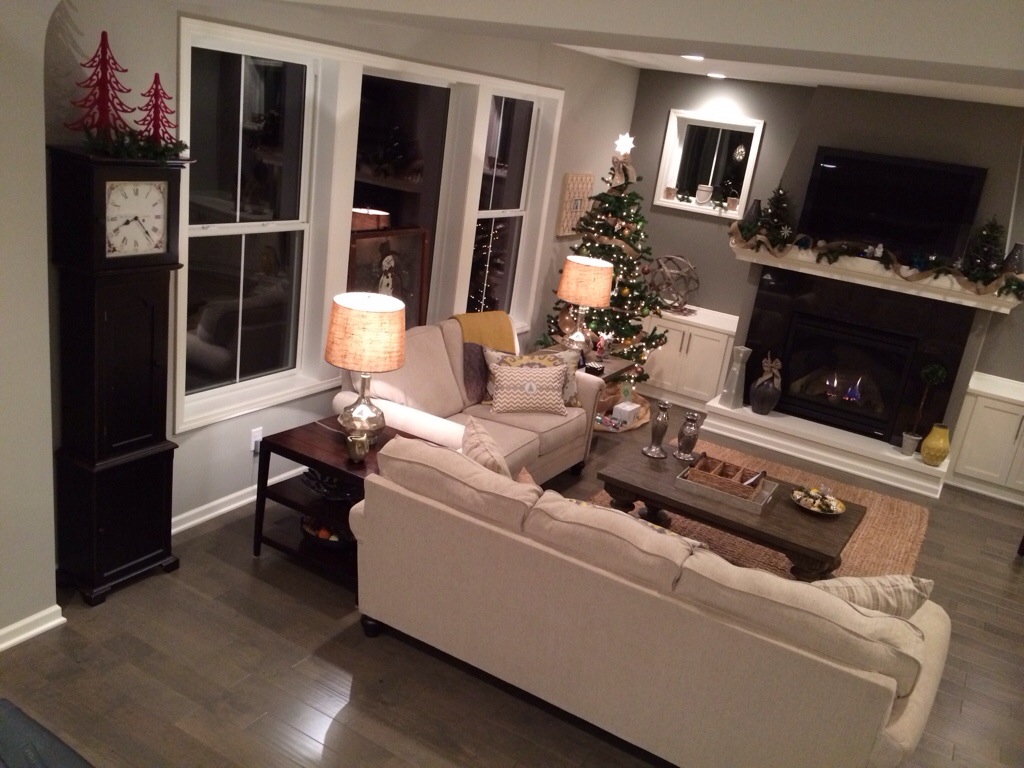
When we built YellowDoorWorld we were pretty specific as to the places we wanted light fixtures vs. recessed lights. At $110 a pop recessed lights were spendy and worthy of serious thought while the standard light fixtures we knew could be easily replaced. Almost a year in we haven’t regretted our selections for the positioning of the recessed lights but have reached our tolerance of what some refer to as “boob lights.” I mean, really, who wants to look up and see an image of that?!

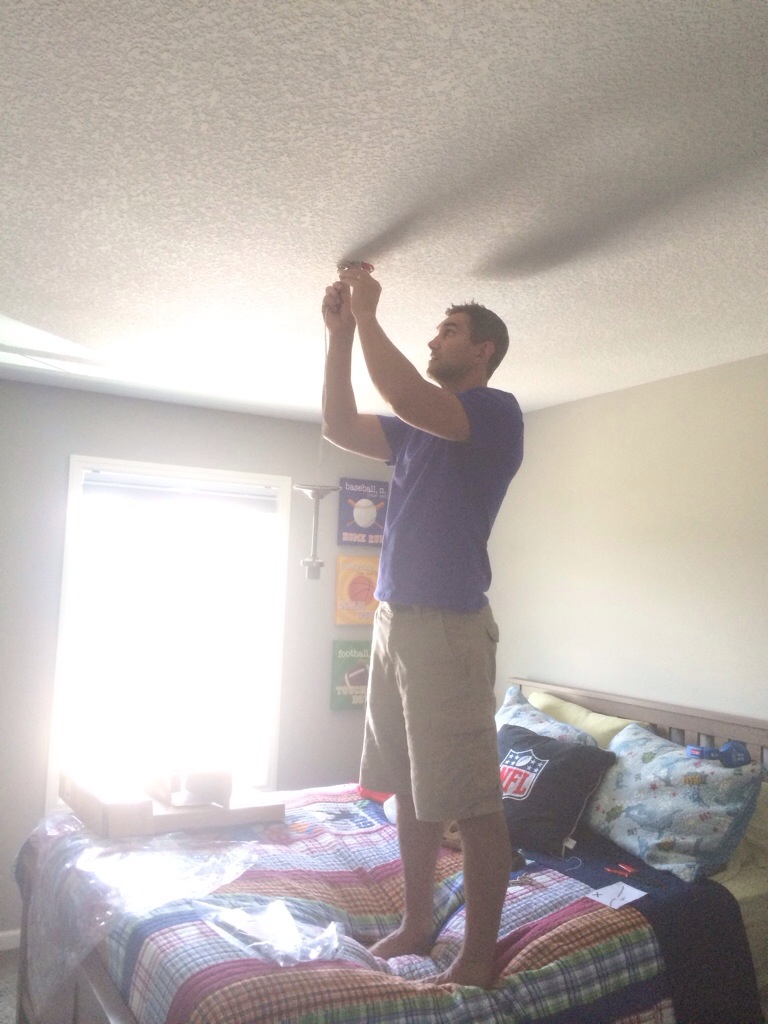
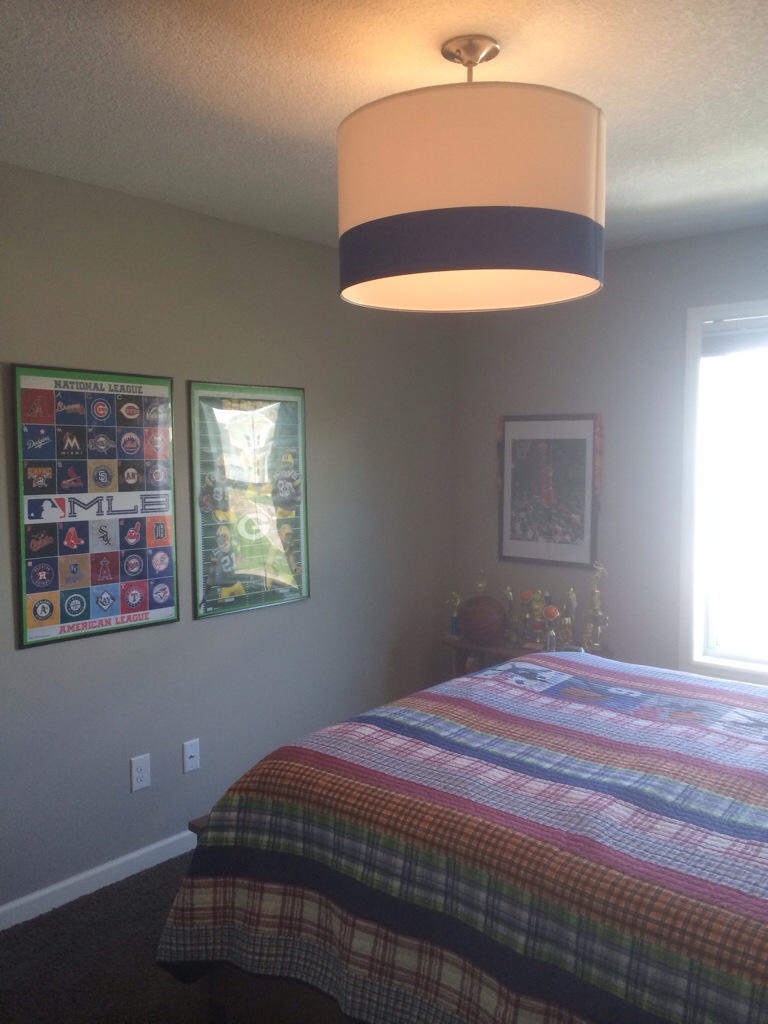
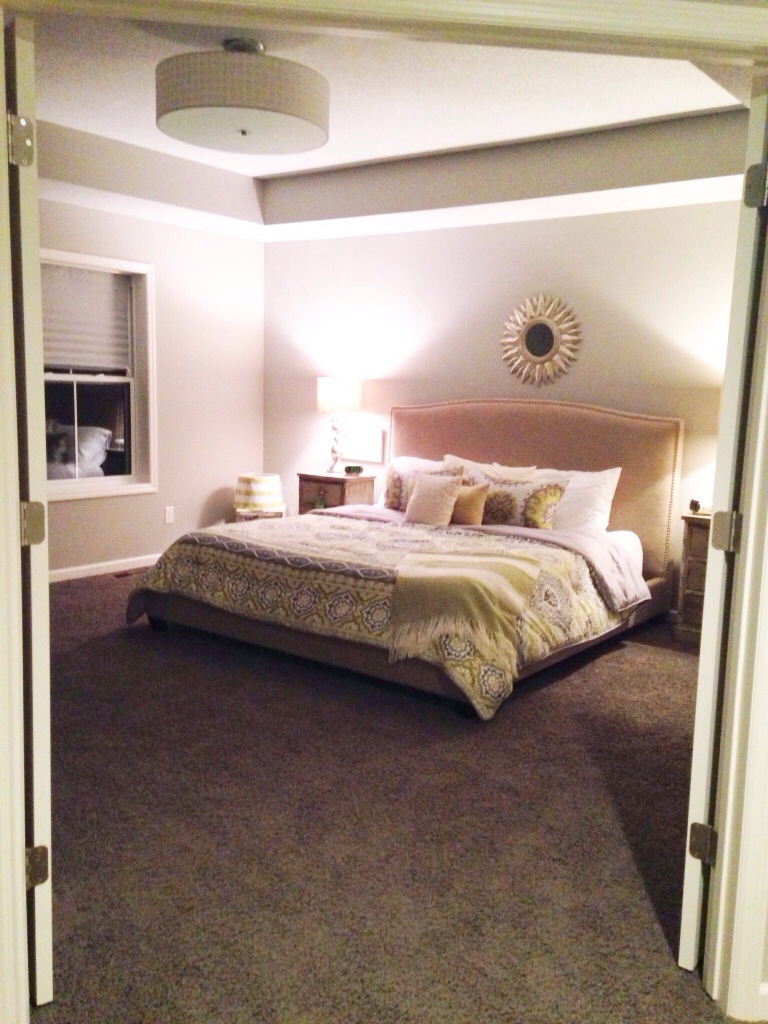
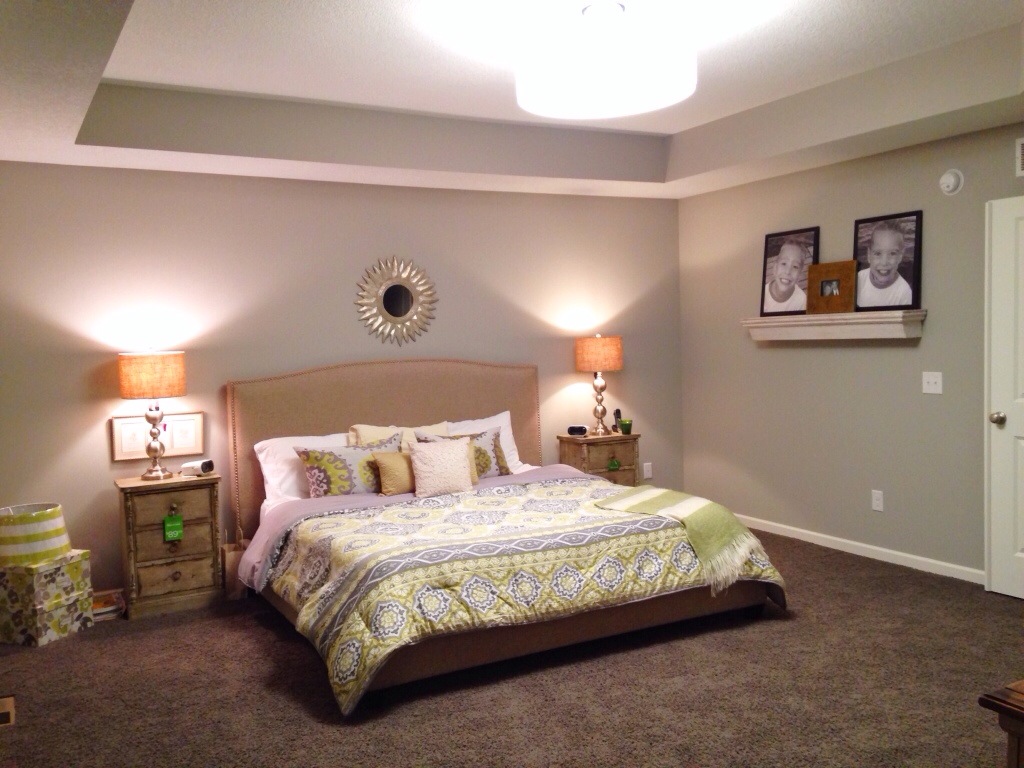
We decided to start with Owen and Logan’s room and a trip to Ikea proved valuable. They had huge drum shades that we’d seen before and I thought it could work for their room. We picked up two of them for a mere $29.99 each plus what we thought was the lighting adapter for another $10.00. The drum shade has Velcro and a piece that it easily wraps around. Upon our set up at home, Ben realized we didn’t get the right adapter piece but leave it to him to come up with an alternative. He used the lighting part of our original island lights and worked his magic to create a great new look in their rooms. Light Brite never gets old, I guess.

20140720-125258-46378430.jpg

20140720-125257-46377768.jpg

20140720-125258-46378790.jpg

20140720-125258-46378116.jpg

20140720-125259-46379149.jpg

Let’s Do Some Business

There is a variety of business that happens throughout one’s home but some business people prefer to have happen behind closed doors. The master bath at YellowDoorWorld, similar to many other master baths these days, has a separate area for the toilet. While we had the main part of the master bathroom figured out with decor early on, it took a long while to garner any inspiration for that smaller space.

Sitting on the throne one day (I couldn’t resist), I realized some shelving would help add a little dimension to the flat boring walls and I figured I could probably find some things around the house to put on the shelves for some pops of color.

So off to TJMaxx I went but disappointingly, this go round I left empty handed. A quick trip to Target and I found a set of shelves in just the right size. And, it was perfect timing, too, for the dollar spot section of Target had adorable gray and white chevron pencil box holders for a mere buck! With the extra quatrefoil towels I bought while we were building the house (tip: when you find something you like, there’s nothing wrong with buying back up items), I was starting to get a feel for how it would come together.

About this time I also saw a great monogrammed piece of art on Joss & Main. From the color it appeared to be (key word “appeared”) on the site I was excited and ordered it right up but when it arrived it was tinted purple and I figured it wouldn’t work. I was wrong and it actually added a good contrast.

Once the shelves and art got on the walls the space went from a cold blahthroom to an inviting space– perfect for doing some business.

20140627-232920-84560222.jpg

20140627-232920-84560573.jpg

20140627-232920-84560898.jpg

20140627-232921-84561323.jpg

Porch of Coffee

Summer, dare we say, has arrived and with it the burning desire for projects!

We’ve been cooped up for so many months and any nice weekend in April and May has been chalk full of activities so for the long Memorial Day weekend we opted for zero plans with anyone but ourselves. It’s been glorious. As we looked around the inside and outside of the house we realized a perfect easy project would be to stain the front porch, which we didn’t get to last fall.

I don’t know how often people stain their porches or decks but when we went to The Home Depot it sure seemed like there were a lot more options than when we stained our deck at our 1475 West Pond Road house. Ben and I agreed we didn’t want to just put a coat over the cedar but deciding on the color wasn’t easy.

The gal recommended transparent but the color options weren’t what we were going for–and then I saw it–semi-transparent Coffee. I could picture the color working well with the gray of the house and bringing out the darker color in our front stone. Too, it just felt a little rustic which is something we like both inside and out.

Two easy coats and voila! The porch looks night and day different. There are three things I love about the stain color we selected:

1. The gray and white trim really pop.
2. The varying colors in the stone definitely stand out more.
3. Our porch looks significantly bigger.

And so, with that I can gladly say to neighbors and visitors, have a porch of coffee.

20140525-215319-78799745.jpg

20140525-215318-78798243.jpg

20140525-215321-78801383.jpg

20140525-215320-78800700.jpg

20140525-215858-79138581.jpg

20140525-215859-79139340.jpg

20140525-215858-79138985.jpg

The Big O

Few things in life, besides the obvious of faith, family and friends, make me as happy as those instant moments of inspiration for a project…

We found ourselves in Rochester the first wknd of March for Owen’s state basketball tournament. There’s a Hobby Lobby there and Ben’s mom loved that store as does my Aunt Caryl. Any trip to Roch requires a stop. On this trip we happened upon a variety of letters in gray chevron but of course the letter B was out. Alas, I found an O and it hit me then and there I could have some fun. My initial thought was to find a mirror and use to fill in the hole. That in and of itself made got my happy juices going. But the other night I found a letter B I purchased and painted for another project that it didn’t work for and realized I had something better on my hands.

I used some of the corrugated cardboard left over from when we purchased plates this fall (saved bc it’s perfect for crafts), taped it to the back of the O then put the B on the top of the O for a monogrammed piece of art. Best part, under $10 for the project and it looks perfect in the Mudroom.

Now that’s a Big O to smile about!

20140330-175717.jpg

20140330-175708.jpg

20140330-175700.jpg

20140330-175725.jpg

Curtain Call

There are two specific costly things that seem to get glossed over when building a house–gutters and window treatments. The thought, let alone the cost, didn’t fully cross our minds until we were a few days away from moving into the house.

The gutters got priority voting and after the rotten winter we’ve had I’m very glad we didn’t wait. The window treatments however were of little importance to us especially after our fab neighbor Eydie clued us into the inexpensive room darkening $5 blinds at Home Depot. We scooped those puppies up in august and they fared just fine. Minus the tedious nature of putting them up each day (8 of them), they looked and worked perfectly. Plus the estimates we were getting ranged from $3000-$6000+ for what we invested $40 in with the paper blinds. Oy!

In January we finally decided to be become adults and invest in real window treatments but still didn’t want to pay the obnoxious cost. Enter our neighbor from the Twins Court ‘hood, who as an interior designer, was able offer expert input and helped us out with finding a great product for a fraction of the cost. We went simple white, up/down cordless blinds and are satisfied with the result.

The real issue was what to do with the kitchen. Our backyard view is fabulous and you don’t see anything but yard and trees. We all agreed to not get blinds for either set of windows but knew we needed something for the side window where we can see the houses on the hill to the left. We thought we’d carry through on the burlap look on the lights in the gathering room and counter chairs but Benji found fantastic gray/off white Chevron curtains at West Elm. We ordered four panels for each of the kitchen windows and… They. Are. Perfect.

In the end, while we were apprehensive to put anything on the windows given how pretty they look on their own (and the cost), we knew were a necessary evil.

Now, when needed and wherever we are in the house, we can have a curtain call anytime we want.

I’d say that deserves an encore.

20140317-204326.jpg

20140317-204355.jpg

20140317-204458.jpg

20140317-204510.jpg

Counter Act

There was one corner of the kitchen counter that was clearly feeling neglected after the subway tile project but had an idea of what I wanted to fill the space. The items needed: galvanized tin canister, lemons, glass vase-thing and greens. Headed to Michael’s to hunt around and found some perfect items and one I didn’t expect that threw my idea for a loop but better!

I then went to TJMaxx–it’s right next door and when near a TJMaxx must go in–and found a neater and less expensive glass vase-thing and greens. Came home, gathered the items, put it together and smiled in delight at my creation.

It’s a counter act I’m proud of!

20140215-163346.jpg

20140215-163358.jpg

20140215-163418.jpg

20140215-163426.jpg

Subway Chic

One of my least fond memories when it comes to the Subway is the trip I took in NYC in 2007 from mid-town to uptown. We came to a fast stop, I wasn’t holding on and BOOM fell flat on my face (in a dress no less). That Subway was dirty and my fall was not a pleasant site to see.

But when it comes to Subway tile, well, that’s a different story. Whether it’s crisp white or in a fun color, subway tile in the home is gorgeous and a look Ben and I were anxious to put in YellowDoorWorld. We had it in the plan and ordered up but when we wanted to go for the big kitchen island we had to find things to scale back on and decided the backsplash could wait…until now.

As our house projects have been slowing, we’ve been getting antsy and getting the backsplash done was at the top of the list. Turns out the baseball coach at Simley does tile work on the side so Ben had him come over for an estimate and two weeks later the project was complete. It’s fantastic!

We opted for a shiny light gray with white grout to make both pop. Some of the kitchen accessories already work perfectly for the counter but on my list yet to buy–if I can ever find some spare time–are a few clear glass jars to fill with lemons and a few galvanized steel things, ala an adorable magazine holder I picked up at TJMaxx and the attached picture.

I’d say our kitchen is now Subway chic!

20140205-130931.jpg

20140205-131004.jpg

20140205-130949.jpg

Coaster Creation

I found the cutest monogrammed coasters in 2011. Bought several of them to give away as Christmas gifts and two packages for us because I’ve always liked things with our last initial, I loved the black and white look of them and I could feel a craft project looming.

Those coasters lived with us at our West Pond house from Nov 2011-July 2012, moved with us to Twins Court from July 2012-Aug 2013 and found a drawer here at Addisen Court. I thought I found the perfect opp to use them after we moved in by using some corrugated cardboard when we purchased new dinnerware but after buying several picture frames to fit my idea, none worked and the little coasters went back to their drawer…until today.

Last night we were at TJ Maxx and there, like magic, was the perfect frame–and for only $14.99. Gray, little squares that I was sure would fit and a little distressed. Love.

I couldn’t wait to get home and put the coasters in the frame but wouldn’t you know they were literally less than a centimeter too big. No worries though, Crafty Cat Nat got handy today and used a little razor blade and voila, the coaster fit perfectly and after two years my Coaster Creation is complete.

Pinterest worthy? I mean, I think so.

20140112-202020.jpg

20140112-202033.jpg

20140112-202041.jpg

20140112-202049.jpg

20140112-202100.jpg

20140112-203937.jpg

A Yellow Door Holiday

Our first Christmas in YellowDoorWorld has come and gone. Next thing you know we ‘ll be ringing in the New Year and toasting to 2014.

Decorating the house for the first time was loads of fun and I didn’t go close to overboard on buying new things. In fact, aside from a few new pillows, little items from the dollar section at Target and a ton of burlap ribbon and bows I made good with everything we already had.

I suspect next year we’ll see some new things…like a new tree and ornaments and lighted garland. I also have some ideas for snowflakes from the ceiling and outdoor accessories.

After reading the Dec. issue of HGTV Magazine, I’ve also decided I’ve got a goal of getting YellowDoorWorld in a magazine. I really do love decorating and it’s fun to see how things can come to life with the vision Benji and I have. We’ll see what happens.

It was a white Christmas outside and full of love inside at YellowDoorWorld but spring still can’t come soon enough.

20131229-210214.jpg

20131229-210232.jpg

20131229-210255.jpg

20131229-210343.jpg

20131229-210409.jpg

20131229-210450.jpg

20131229-210458.jpg

20131229-210619.jpg

20131229-210642.jpg

Let’s Hit the Hay

Ah, the oasis that is the master bedroom! One thing we loved about our floor plan was the big, big master with a huge window looking out to the backyard full of trees and nature.

During the selection process we opted to do a box-vault ceiling but didn’t have them install a light fixture as we figured we’d do a ceiling fan or something chicer. We decided we wanted a giant drum pendant but didn’t want to spend the $400-$800 we were seeing. One day we stopped into Menard’s and there it was… Ginormous and just what we had envisioned–and for just over $100. Ordered it, installed it and perfection!

This was also our opportunity to upgrade to a king size bed. Who knew it’d be so life changing. Benji found the mattress on his fav auction site. A brand new mattress and box spring that retailed for $1500 was ours for less than $400. Score. Next up was the bedframe. I knew I wanted a low profile bed with a fabric headboard and nailheads. They’re not cheap but I found the perfect one on Overstock.com. From what I could tell it matched the side tables I found in May at Homegoods. It did! Gorgeous bed and for a fraction of a similar bed we liked at Crate and Barrel.

While I’m still not sure about the bedding it’s working quite well for now and everything is oh-so-calming and comfortable. Thrifty Benji found a Lane brand dresser on Craig’s List for $200 and we simply sanded the heck off the top to create a great piece. Add in our flea market floor length mirror originally from an elementary school girls locker room in Cedar Rapids, Iowa that we purchased back in 2001 and things are coming along pretty well. (Forgot to take a picture of the mirror.)

A few weeks ago I found a huge shelf at Homegoods on clearance for $30 and had to scoop it up. Surely, we’d find a spot for it. After a few trials and errors we found the right spot–our bedroom. We added two of our most fav blow up pics of the boys and loved how it all filled an empty wall.

We’ve got a fun weekend project to add some detailing on the wall with our headboard and once done think the room will be complete. Except for the chair I need to go in the corner…and getting the California Closet installed…and finding a few pieces of artwork…and getting shades and drapery installed and…Okay, maybe a few things are left after all.

Until then, I still find myself happily hitting the hay each and every night!

20131110-211720.jpg

20131110-211738.jpg

20131110-211749.jpg